In the 1980s, we rarely used to buy audio cassettes. It was a lot cheaper to record songs from the radio. It’s amazing that in the 2000s, this technique seems to be less used than before.
If you wanted to record a song that was streamed online, you could go through the complex procedures I’d mentioned earlier to download online songs, or you could use the 1980s technologies. Get a tape recorder, connect the headphones of your PC to the tape recorder’s microphone using a stereo cable, and record to your heart’s content.
Except, of course, that tape recorders are rather outdated. And with the right software, your PC can act like a tape recorder. Here’s how you can go about it.
- Download Audacity and install it
- Download Lame and save it
- Open Audacity and select “Wave Out” as the source
- Play a song online and click on the Record button. Press the Stop button when done
- File - Export as MP3. (The first time, you need to tell Audacity where you’ve saved Lame)
That’s it. You can convert anything your computer plays into an MP3 file. (The general rule in digital media is: if you can see / hear it, you can copy it.)
OK, lets’ do this more slowly.
1. Download Audacity and install it.
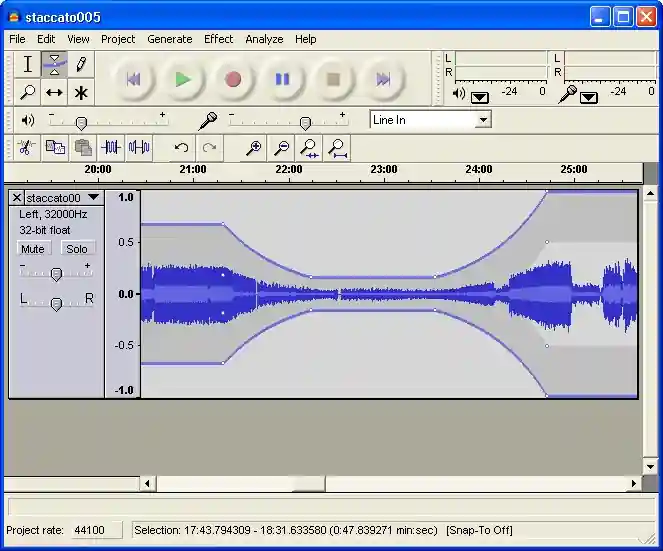
Audacity is a program lets you record and edit music. Just visit the link above (or search on Google for “Download Audacity”) and install the program. This is what it looks like.
2. Download Lame and save it
When you record something with Audacity, you’ll usually want to save it as an MP3 file. Lame is another software that lets you do that. Go to the link above, download the ZIP file, and unzip it in some folder. (Remember where you unzipped it.)
3. Open Audacity and select “Wave Out” as the source
You can choose which source to record from in Audacity. Do you see the “Line In” in the screenshot below? That’s the source from which Audacity will record sound from. Usually, your PC will have a “Microphone” socket, and may have a “Line in” socket. It may also have a built-in microphone. Depending on what sockets and capabilities your PC has, you may see different things.

One of these sources will probably be “Wave Out”. That lets you record any sound played by your computer. So if you want to record a song your computer’s playing, what’s what you should choose.
Not all sound cards have the “Wave Out” option, though. Many laptops that I have used don’t seem to have this option. If that’s the case with you, there’s a fairly simple solution. Just buy a stereo-to-stereo cable (shown below) and connect your headphone socket to your microphone socket.
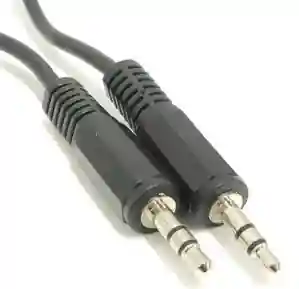
This transfers everything your computer plays back into the microphone, and you can select “External Mic” as your source.
Buying this stereo cable has another advantage. Rather than connect one end to your computer’s headphones, you can connect it to anything: your old cassette player, your radio, a microphone, whatever. So that means you can now:
- Convert your old tapes to MP3
- Record songs on the radio as MP3
- Record songs from the TV / DVD player as MP3
- Record live conversations as MP3
- Record phone conversations as MP3
- etc.
4. Play a song online and click on the Record button. Press the Stop button when done
That’s easy. The Record button is the red circular button that’s third from the left. The Stop button is the yellow square button that’s second from the right.
5. File - Export as MP3
When you’ve stopped recording, you can actually do a bunch of useful things with Audacity.
The first is to adjust the volume level. Go to the Effect menu and select Amplify. Then you can try different amplification levels to see how it sounds.
The next is to trim the audio. Unless you’re really fast with the keyboard, you probably have some unwanted sound recorded at the beginning or the end. You can select these pieces by dragging the mouse over the wiggly blue lines, and go to the Edit menu and pick Delete.
Lastly, you’ll want to set the sound quality. Go to Edit - Preferences and under the File Formats tab, set the bit rate under the MP3 Export Setup section. (If you don’t know what rate to put in there, 128 is a safe number. If you want better quality, increase it. If you’re short of disk space or want to mail it to someone, decrease it. Based on my experiments, even a good ear can’t tell the difference at 128. I use 64 or 96. My ear is pretty bad.)
All of the above was optional. If you just wanted to save the file, go to the File menu and select “Export as MP3”. The first time you do that, you’ll be asked to mention the folder where you saved lame_enc.dll (which is where you unzipped Lame.) Show Audacity the folder, and that’s it.
Comments
Thanks lot for your technical supports and guidlines. Still I couldn’t able to understand what have to do for recording my skype conversation. Can you help on this?
I use Acer 2413 laptop which has one headphone port and another microphone port. I have Stereo to Stereo to cable. Can you tell me what the next step to proceed for recording Skype conversation, and next for recording online songs?
Thanks & Regards
Vivetha
Madurai
http://www.voip-sol.com/15-apps-for-recording-skype-conversations/
Thank you for the updates.
Can it download all Online songs from all sites?
The Lame site says as follows: “Once you have unzipped the archive, you will have a file called LameLib or libmp3lame.dylib”
However after downloading I am not getting the above files in the zip folder. There are 2 notepad files and one dll files in the zip folder.
Could you please advise me what to do next.
Thanks and Rgds,
Preet
Chennai
The wave out option is not appearing in the Audacity version 1.2.6 which I downloaded.
Thanks and Rgds,
Preet
Chennai
If “Wave Out” does not appear as an option, your sound card doesn’t support that option. Your only option is to use the stereo cable.
thanx for ur support
i have a proble, no any option highlighted in ‘‘SELECT COURCE’’ area
plz told me solution
here i see recordind & save that but without sound
Thanx & rtegards,
Ashwani Shukla
It is a challenging job?
great site and very helpful.
My sound card does not support “Wave Out” so i bought a stereo-to-stereo cable, exactly as the pic you’ve put.
After connecting the ends to my headphone and mic slots, i tried to record, but no positive results.
The options shown by audacity both before and after plugging in the cable are “Front mic, Mic Colume, CD Volume, Line Volume”.
I’ve got a Logitech webcam,which is the “Front mic” i think, and it does record my voice when i record after chosing that as the option.
How do i go about recording playback of whatever songs i play on my PC using audacity using the cable ?
Any help is greatly appreciated. (….u’re on vacation..)
keep up the good work !!
-kk
options: “Front mic”, “Mic Volume”, etc. I usually do this hit-and-miss, and
something eventually works.
My audacity doesn’t even have that drop down menu. Its just a gray box…any ideas?
Thanks
you may have to do it the old-fashioned way: play it on one computer,
connect the headphone socket to another computer’s mic socket, and
record it on the second computer.